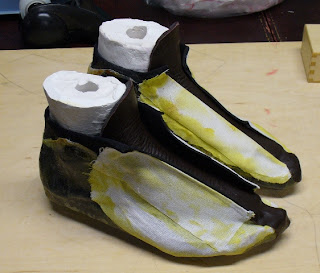
In the right foot I have used five layers to create the footbed. I glued the blocks onto one of the footbed layers and wetted down these layers and let them set. Not shown in the photo is the fact the I placed an inline frame (without wheels) on top in order to get the spacing right. I used chopped up fiberglass mixed with epoxy as a filler material around the blocks. Otherwise when the big layer go over the top an air bubble will form.

The next step was to put the rest of the fiberglass pieces in place, wet them down with epoxy, roll out the air bubbles and then vacuum form in place. To vacuum form I wrapped the wet shell in plastic film (with pin holes poked in it), taped quilted paper towel in place as a breather material, put the whole thing in a 2.5 gallon ziploc plastic bag, inserted a plastic tube, sealed it off, and then applied a vacuum. First with a vacuum cleaner to get the excess air out of the bag and then I switched over to a hand vacuum pump. See the setup in the next photo:

I used a slow setting epoxy so I left the vacuum on for a few hours. the result was mostly satisfactory. There are lots of wrinkles, and ridges in the transition areas from a single to a double layer of neoprene. That is about the worst of it. I will use plastic tape for masking in the future. Masking tape absorbs the wet epoxy and is hard to remove and leaked through in some places. The next photo shows the complete shell. Unlike carbon fiber the fiberglass is almost transparent.

The next photo shows the shell removed from the plaster foot.

Finally, I used contact cement to add some backing/reinforcing material to the neoprene upper. I also have the tongue in place which is a quarter inch layer of EVA foam cemented to a piece of an old leather jacket. More leather to come in my next posting.

Additional photos on my Flickr page.

No comments:
Post a Comment